Search This Blog

Showing posts with label recipe. Show all posts

Monday, April 14, 2014

Fennel and Apple Salad


This is one of my favorite salads.  It is super fresh and crispy and oh so good.  The fennel has a slight anise flavor and paired with the crisp apple and the tart juicy dressing with orange essence.. it's simply delicious.  Super easy to make, too. 

Fennel is a super healthy! Come on, you know I am going there.  Real quick with a link if you want to read more about this super food.  

Great source of vitamin C, fiber, folate and potassium.  In addition, it is a phytonutrient. Shown to reduce inflammation and to help prevent the occurrence of cancer.  There is a biological mechanism that shuts down the intercellular signaling system called tumor necrosis factor.. alright, I don't know how to explain all this.  Go here and read about it. 
Now for the recipe. 

Recipe notes:  
If you don't have orange marmalade.. you can sub honey and splash of orange juice.  

Fennel and Apple Salad

1 fennel bulb, sliced thin 
1 apple, sliced thin

In mason jar..
1/4 cup lemon juice
1/3 cup grape seed oil
1/3 cup olive oil
1/2 t. dijon mustard
1T. orange marmalade
S + P

... Shake til emulsified and pour over the fennel and apple.  Toss together and serve.  
(This makes more dressing than you will need but it's great on any salad)

Super yummy additions that take this over the top:  
Orange sections
walnuts
blue cheese crumbles

Tuesday, April 8, 2014

Healthier Baked Oatmeal with fruit


Made this for Sunday School and it got rave reviews, so I thought I would post.  This recipe is inspired by my mom's baked oatmeal which is delicious but way to sweet for me.  This is a healthier version and I think she would love it too.  Using whole oats not instant makes a difference.  They hold their structure way better and you end up with a better texture than the instant.  Plus, they are way better for you.  I love using the banana on the bottom, it adds a lot of sweetness so you don't need as much sugar.  
What I love about this recipe and you will too.. is not only are there endless possibilities depending on the fruit, spices you choose but it's a delicious and easy make-ahead baked breakfast, perfect for gatherings.  
As far as berries, frozen or fresh both work well here.  Which makes this super easy. We use a variety from our frozen stash of summer berries or a bag of Trader Joe's Very Cherry Berry, which is amaze. Stone fruit, fresh or frozen works really well too.  We love this with peaches.  Just with blueberries is super yummy too. 
I like to serve it warm with a little cream to pour over.    It can also be made ahead of time which makes it great for a holiday breakfast gatherings or brunch.  Can be doubled.  

HEALTHIER BAKED OATMEAL

Fruit:

2 ripe bananas, sliced into 1/2-inch pieces
1 1/2 cups (frozen or fresh) Berries or stone fruit (frozen or fresh) 

Dry ingredients: 

2 cups whole rolled oats (not quick oats)
1/2 cup walnut pieces, toasted and chopped (divided)
1/4 cup natural cane sugar or maple syrup
1 teaspoon baking powder (
aluminum-free)
1 1/2 teaspoons cinnamon
1/2 teaspoon fine-grain sea salt

Wet ingredients: 

2 cups milk
1 large egg
3 tablespoons unsalted butter, melted and cooled slightly (divided)
2 teaspoons vanilla extract

1)  Preheat the oven to 375°F   Butter the inside of an 8-inch square baking dish.

2)  In a bowl, mix together the oats, 1/4 cup of the walnuts, if using sugar instead of maple.. add the sugar here, baking powder, cinnamon, and salt.  Set aside.

3)  In another bowl, whisk together the milk,  if using maple syrup instead of sugar.. add the syrup here, egg, vanilla extract and half of the melted butter.  Set aside.

4)  Arrange the sliced bananas in a single layer at the bottom of the prepared baking dish. Sprinkle two-thirds of the berries over the top. 
Cover the fruit evenly with the oat mixture. 
Pour the milk mixture over the oats gently, so that it is evenly distributed. Jiggle the dish to make sure the milk mixture is throughout the oats. 
Scatter the remaining berries and walnuts on top.

5)  Bake for 35 to 45 minutes, until the top is nicely golden and the oat mixture has set. Remove from the oven and let cool for a few minutes.  Drizzle the remaining melted butter on the top and serve. 


This dish can be made ahead the night before and reheated in the morning.   What I like to do is assemble the banana, berry and dry oat layer in the baking dish, cover and place in fridge.. In another bowl, Mix together the wet ingredients, cover and place in fridge.  In the morning, pour the wet mixture onto the oat mixture, top with berries and walnuts and bake.  

kids can help on this step.. Scarlett is practicing good knife skills
slicing a banana with a butter knife.  Layering them in a
buttered 8x8 baking dish.

Pour the oats over the berries and bananas. (Forgot to
photo the bananas with the berries, but I think you can imagine)

Pour the wet ingredients over the oats, tap the dish to be sure
the milk mixture is evenly distributed through the oats.

Top with remaining berries and walnuts.  Ready to bake.

All done, cut a scoop and cover with a little cream. 

Friday, March 21, 2014

Greek Easter Clove Cookies Kourabiethes


With Easter approaching, this is a good cookie to post!  I first had these cookies at my friend Roseanna's. And oh my UMM! Seriously delicious.  The most tender butter cookie with a delicate clove scent and taste, yet not overpowering.  Especially if you pull the clove out before eating.  However, being so good.. I did forget to pull one out before it got shoved into my mouth.  And let's just say.. elevated the whole clove experience quite a bit!  
The ouzo is a Greek aperitif which is reminiscent of licorice, anise.. Similar to Pastis, which is french and Sambucca, which is Italian.  You could substitute either just fine.  The aperitif does not overpower or overtake the cookies.. it just makes this amazing flavor in the end result.  If you don't want to use, you can easily just omit.  You will still have an amazingly delicious cookie.   
I am not greek.. but this will be an Easter cookie tradition I am starting from now on. 

Kourabiethes

1lb unsalted butter, softened
2 large egg yolks
1/2 c organic confectioner’s sugar, plus more for dusting
2 T. ouzo (or sub. french Pastis or Italian Sambucca)
1/2 t. vanilla powder or 2 t. vanilla extract
1/2 c almonds, toasted, cooled and chopped very finely ( I use a coffee mill)
1lb cake flour (about 3 1/2 - 4 cups)
1/2 t. baking powder
1/2 t. baking soda

Whole cloves for decoration

In the bowl of a stand mixer, add the butter and mix until light and fluffy, about 5 minutes. Scrape the sides of the bowl and add egg yolks and confectioner’s sugar. Mix well. Add the ouzo, vanilla, and the toasted chopped almonds.

In a separate bowl, sift the flour, baking powder and baking soda together. With the mixer on low, add the flour to the butter mixture and mix until just incorporated. You don’t want to over mix the dough because that will toughen the cookies.

Chilling the dough for about half an hour makes it easier to handle and roll.

Preheat the oven to 350 degrees.

To shape:  take a piece of dough about the size of a walnut. Roll it into a log and then curl the ends in and pinch slightly to make a half-moon or crescent shape.

Stud each cookie in the center with a whole clove and bake in the preheated oven for 20 minutes or until just beginning to brown.

When the cookies are still very warm, dredge in confectioner’s sugar.  The sugar layer will almost melt and coat the cookies.  After the cookies cool a bit, add another dusting of confectioner’s sugar.

You can remove the clove before serving or just warn guest not to consume.  Unless they like that sort of thing!


Thursday, March 13, 2014

Healthy Flavorful Chicken & Noodles Soup


This recipe was always my go to when someone I knew was sick or when I am having a "spa" mood.  That interpreted means.. I am being really healthy and eating light, usually a week after a cleanse, this is a meal I make.  
I'd like to call it the clean and fresh updated version of Chicken Noodle Soup.  I first made this around '97 and this was before I ever had Pho.  It probably was a Martha Stewart recipe, not sure.  Now and especially living in Seattle, there is a lot of Pho around and I would say this soup is similar to a thai noodle soup.  What I love about this soup is the freshness of it all.  I also love how it's served.  The hot broth infused with a thai sauce, which is tasty and delicious but not overpowering, is poured over a bed of cellophane noodles topped with red onion, scallions and the pulled chicken which produced the lovely broth..  that then is ladled into individual bowls and you then garnish with fresh, cold veggies. So when you eat the soup you have the hot broth, fresh herb brightness and the crunch of a cucumber, pepper and bean sprouts.  All which impart an incredible fresh deliciousness.  If you are gluten-free.. this is a great meal for you.  Hello, noodles!  

Super easy to make, the only thing that takes time is chopping and assembling all the accompaniment ingredients.  I love this for entertaining at lunch or light dinner.  This soup will easily serve 10 -12 people.

Flavorful Thai Chicken & Noodle Soup

1 Organic whole Chicken (often called broiler chickens) 

Sauce:

1 c Nam pla (fish sauce) 
3 Garlic cloves; crushed 
2 T Peeled fresh ginger; grated using a rasp or fine minced
3 T Freshly squeezed lime juice 
2 T Dark brown sugar 
1 t Red-pepper flakes
1/4 water

1/2 lb Cellophane noodles

Accompaniments: 

1 sm Red Onion.. halved and sliced lengthwise
1 bunch of Scallions.. trimmed and sliced
Fresh Mint.. pull leaves from stem .. (3-4 leaves per person)
Fresh Cilantro.. tough ends trimmed (1 tender stem with leaves per person)
2 c Mung Bean Sprouts
1 long English Cucumber.. peeled & halved lengthwise & cut on the diagonal 1/2" slices
2 Orange Yellow or Red bell peppers.. halved and sliced lengthwise in julienne 
2 Limes.. cut into wedges (1 wedge per person) 

Chicken:

Place chicken in a large pot and cover with cold water.  Bring to a boil and reduce heat to low.  Simmer uncovered for 30 to 45 minutes, depending on size of chicken. 
Remove chicken, and discard the skin and bones (I freeze bones for future bone broths), reserve broth. Cut chicken into large pieces, set aside in fridge til ready to use.

While Chicken is cooking prepare...

    Sauce:
In a medium bowl, whisk together the fish sauce, crushed garlic, ginger, lime juice, brown sugar, red pepper flakes and water. Set aside.  

    Accompaniments:
Prepare all as above and place in individual bowls (except onion and scallions) for garnish.  Set aside.

    Noodles:
Soak noodles in warm water for 15 minutes and drain well. (do this 15 min or right before serving) 

Bring chicken broth (reserved in pot) to a simmer. Stir fish sauce mixture into simmering broth.  

Assembly....

Place noodles in the bottom of a large serving bowl, arrange chicken on top, then add the sliced onion and scallions. 
Ladle hot chicken broth mixture over chicken and noodles. 

Serve immediately.  Garnish with cold vegetables and limes. 

Thursday, October 10, 2013

Stuffed Eggplant


This eggplant recipe is a good "starter" for those and kids who "don't like eggplant".  It simmers with tomato sauce and the result with the addition of cheese.. is simply delicious.  The flavors meld and the eggplant is mild.  I made this last night and for Scarlett's dinner, but baked hers in a casserole dish mixed with cooked penne pasta I had in the fridge.  (If you have learned anything about me yet.. You will know there is always extra pasta made whenever I cook it, so there are plain noodles awaiting a moments notice in the fridge)  Think yummy baked pasta..  This worked really well for her.. she exclaimed that dinner was "awesome" when she tasted it.  Triumph!   
Stuffed eggplant is one of my comfort food recipes from growing up.  Had it first when an Italian friend made it for my family for dinner.  I haven't altered it much, I think.  But I don't have a recipe, just was shown how to make.. so it might be a little different over the years.   This recipe here is the base and I often add more veggies. Carrots, mushrooms, kale and especially when zucchini is in abundance, it can be diced and added in.   You can also add ground meat or sausage for a heartier meal.   And I always like to top mine with a sprinkle of red pepper flakes for some added heat.

Stuffed Eggplant


1 large or 3 small eggplants
4-5 slices of Provolone cheese
Fresh spinach (enough to create bed in base of each)
2 T. olive oil
1 onion, diced
1 red or yellow pepper, diced
2 cloves garlic, minced
2 cups tomatoes diced, in juice
1/4 c. bread crumbs
1.5 t. sea salt
1/2 t. fresh cracked pepper
1 t. basil
1 t. parsley


(topping) 
1/2 c. Panko bread crumbs
1/4 c. parmesan cheese
handful of shredded mozzarella
1 T. Extra virgin Olive Oil (plus more for drizzling)

Pre-heat oven to 350ยบ
Cut the eggplant in half and scoop out the flesh with a spoon, leaving a small bit to keep the shape of the eggplant. 
Dice the flesh into 1" pieces or smaller.  Set aside.  Place shells on a lined baking sheet and line shells with single layer of provolone and spinach.

In a large saucepan, heat olive oil.  Saute onion til becoming translucent, about 3 min.  Add pepper and saute another minute.  Add garlic, saute another minute and add diced eggplant, cook 3 min over med low heat.  Remove from heat and add Tomatoes with juice, bread crumbs, S+P, basil and parsley.
Spoon into shells.  
In a small bowl mix together  panko, parm, mozz and basil.  Moisten with olive oil.  Sprinkle on top of eggplants and drizzle with olive oil. 
Bake for 50 min. Till eggplant is bubbly and tops are lightly brown and crusty. Serve Warm.


Scoop out flesh with a spoon.  
Once you spoon around the edge, using your hand to pull out the center. 

Leave just enough flesh to keep shape of shells. 

Line with Provolone. (mozzarella works well too)


Ready to be spooned in.
Atop spinach and provolone.. mound it up.

Topped with bread crumb mixture and a good drizzle of olive oil. Oven ready.
Italian comfort food. Vegetarian meal, simple and delicious.


Friday, September 13, 2013

Vegetable Tian


This is a good recipe to know when summer produce is plentiful.  There is usually so many squash, zucchini and tomatoes and this puts them to use. Add japanese eggplant when I have it.. kinda like a layered ratatouille. 
Super easy and really yummy.  

The french term TIAN refers to a shallow layered baking dish, like a casserole, and the food within it. Note: in the winter in a pinch I have used tin tomatoes and it works very well... so not just summer food.  Yummy healthy food.  


Summer Vegetable Tian

  2 T. butter (I use 1 T. butter and 1 T. bacon grease, if I have it)  
  1 large Onion, sliced
  1/2 t. Kosher Salt
  1 T fresh Thyme, leaves only (dried works fine too.. but reduce by half)
  2-3 cloves of Garlic, minced
  
Vegetables to layer.... (any of the following)
  Zucchini
  yellow Squash
  Tomatoes (I prefer Romas here)
  Red or gold Potatoes
  Eggplant (optional.. use what you have) 
  
  Salt + Pepper
  Fresh thyme leaves
  Cheese: Parmesan, Locatelli or Gruyere cheese, shredded (grated works fine if you don't have shredded)

  Bread Crumbs, panko (optional) 
  lemon zest (optional)  
  Olive oil, for drizzling

Preheat oven to 375ยบ  
Heat butter in a sautรฉ pan over med heat, add onions and season with salt and add fresh thyme.  Cook until the onion begins to caramelize.  Add garlic and cook for another 2 minutes.   
Meanwhile, evenly slice the vegetables while the onion is cooking. (Make sure the potatoes are sliced thinner than the other veg, so they cook in the same amount of time) 

Spread cooked onion in bottom of a baking dish.  Begin layering (like tiles) vegetables til pan is filled. 
Sprinkle with sea salt & fresh cracked pepper and thyme leaves.  
Top with breadcrumbs, if using, and cheese, zest and drizzle with olive oil. 

Bake for 35 min. or until potatoes are fork tender.  Depending on how you slice your potatoes, this will vary. 

Sautรฉ onions with garlic and thyme.

Slice all veggies into rounds, fairly thin.

Straight from the garden!

Onions are the base, sometimes I add corn to this sautรฉ

You can make it in any dish, just layer away.


Wednesday, February 27, 2013

Linguini w/ Clams in Buttery Garlic White Sauce

This is what I consider comfort food.  Buttery, garlic-y pasta swirled in with clams and sprinkled with bacon and fresh chopped parsley. Easy and quick.  Especially, if you can find a can of clams you like, like I have.. all ingredients are pantry and this dish can be ready to eat in as much time as it takes for the linguini to cook.  


Clams with linguini served with buttered Trader Joe's Garlic Naan

Recipe notes.. 
You can steam fresh clams for this recipe, but as for a pantry meal.. canned clams work fine here.  I have found and love Trader Joe's Maine little neck whole clams.  One can is enough for one meal.  They are whole, I don't chop them but feel free if you'd like. 

If you don't have a shallot, a small onion minced fine will work ok.  But don't use to much and let it caramelize before adding the garlic.

Bacon is not necessary, but if I have it.. it's a great flavor with the clams and garlic. The best choice for using bacon here is to try and always have little leftover bacon that is cooked and ready in your fridge for when you need it at a moments notice.  like this meal.  However, If your bacon is uncooked,  cooking up some is easy enough.  Here are 2 options.. 1) Cook the bacon in the pan that you will finish the rest of the dish in.  OR  2) a lighter (healthier.. less fat) option is to cook the bacon on rack on a baking sheet  pan in a 425ยบ oven, til crispy.   

Anchovy Paste.  Optional.  Scared? don't be. It melts into the sauce and imparts a delicious depth of flavor that you cannot put your finger on. It does not taste fishy. Try it. If you have anchovy fillets.. this will work fine, too.  Add 4-5 and cook till they literally are unrecognizable and melt into the sauce. Again, optional.. it will still be delish without.

I also usually top with a sprinkle of chopped fresh tomato.  Seasoned with S+P.

White wine is whatever you have open.  I like a dry Chardonnay if I have my choice.  A little for the pot and a little for the chef! If you want to omit the wine, add a little chicken broth.. or forego altogether.. it will work fine

Pasta.. linguini works best for me here.. but use whatever long strand you like. Angel hair or spaghetti is fine too. Cook til ALMOST al dentรฉ (about 2 min. under package directions) then adding to clam sauce and let it finish cooking in the sauce.  It will get tender and also absorb some of the sauce. THIS is what makes really good pasta dishes, no matter what sauce you make. That step alone. 


Linguini with Clams in Garlic White Sauce

4 slices of bacon, cooked, cooled and crumbled (optional)
1lb. linguini, spaghetti or angel hair pasta
1 T. Butter

1/4 c. olive oil
1 shallot, finely chopped
4 cloves of garlic, sliced
1/2 t. red pepper flakes
1-2 t. anchovy paste (optional)
1/4 c. white wine
1 can of Trader Joe's Maine little neck whole clams, in their liquor (don't discard juice!)
fresh chopped parsley
1 small tomato, diced (optional) seasoned with S+P

Cook pasta al dentรฉ, or according to directions & less 2 minutes, in a large pot of heavily salted water. 

Meanwhile, Heat butter and olive oil in large saute pan over med high heat.  

Add chopped shallot, saute til translucent.  

Add garlic, pepper and anchovy paste, reduce heat to medium low, cooking gently til 
anchovy's disappear and garlic is starting to brown.  

Add wine and let simmer about a minute.  

Add clams and all the liquor in the can.  

Scoop pasta right into the pot.  Swirl around and let cook for a minute or two, til tender.  

Add parsley and check for seasoning. S+P if necessary. 

Sprinkle with a bit of the crumbled bacon and seasoned tomato.

Lastly.. give each dish a drizzle of good extra virgin olive oil, to finish. Enjoy!


Friday, February 22, 2013

Citrus Herb Crusted Salmon

I cannot believe I haven't posted this salmon recipe yet.  Hands-down.. this is one of my best and favorite recipes.  

It is so good that when I go out to eat, I am never tempted to order salmon.. as every time I have since making it this way.. I am disappointed.  

I got the original recipe from a Williams-Sonoma catalog sometime around 1995.  I think most of the money I have made in my life went to Williams-Sonoma which guaranteed a steady supply of catalogs at the house and the best part were the recipes mixed in with the goods they were selling. This was one of those.  And I have made it so much, I don't have it written down anymore.  It's something that you can change the measurements, nothing so precious.. doesn't have to be exact.   And did I mention, it's easy? Yep, takes very little time. 


Crispy skin and fish not overcooked, not dried out.  Major delish. 

Some Recipe notes/tips:  
I prefer using Alaskan wild  or farm certified organic salmon. I love sock-eye, which is pictured above. I also prefer to buy a thicker filet than what is shown above.. asking for the thickest piece available.. 1-2" thick.  This recipe is for a filet about 1lb or around 8" in length and 1-2" thick.    

The Citrus. The choice should be to use organic, as you are using the zest only and don't want a sprayed fruit which can alter the flavor and your health.  I have used orange and lime when I didn't have a lemon.. and it was fine.. but the lemon + lime combo is best.

The Herbs.  If you have more parsley than basil or vice versa.. it really doesn't matter.. the outcome will still be yummy, as long as you have a good crust across the whole fillet. 

The Salt.   Please use kosher salt.  I think it makes this recipe. Kosher salt has a softer flavor and the larger pieces work so well here.. for a salty crust. It's readily available near the other salt at supermarket.. I use Morton's and it comes in a blue box. Other sea salts or larger flakes would work well, too. 

Cook on a hot grill, grill pan or cast iron pan.  Above salmon was cooked in a cast iron pan.  Cook skin side down 1st (lightly oiled just as not to stick) to guarantee crispy skin! Don't move the fish around.. let the fish skin cook and crisp and when it is done it will release from the pan.  Health note:  Eating the skin is so good for you, but I can only enjoy it when it is crispy. Health benefits...  it contains collagen, protein and omega 3 fatty acids.  There also is a layer of fat just under the skin which is the main source of the omega-3s.  So, leave the skin on when you cook it, never remove it before. If you don't want to eat it, discard after cooking.. and that way the layer of fat that has the omega-3s will be intact. 

And lastly, and most importantly.. don't overcook!  Salmon is best when just barely cooked, in my opinion.   I don't like it rare.. but just slightly more cooked.  I guess I should disclose here that I also enjoy sushi.. so, cook yours how you like it and feel comfortable with. My feeling is that fresh fish is destroyed by overcooking and most people do.  Cooking the skin crispy, when you flip it.. 3 minutes more is about all you need depending on the thickness of the fish, that will keep it moist and not dry.  To see, make a slice in the middle and see if more opaque.  I always find that cooking this way, you will have the ends and sides that are more well done for those who want that and the center, more rare. Like cooking a steak.


Citrus Herb Crusted Salmon

around 1lb filet of salmon (about 8" length)

In a small bowl combine:  

   zest of 2 lemons and limes, careful not to get any pith (the white part)
   3-4 cloves of garlic, minced (or more!)
   handful of fresh parsley and basil, chopped (enough to equal at least a cup or more chopped [loosely packed] see pic above.. you want a thick herb/citrus crust)
   1 t. kosher salt
   
1/2 t. black pepper or to taste
   Olive oil .. just enough to wet and make like a paste
Spread on fish herb paste evenly (not the skin side)
Heat pan or grill hot and place fish skin side down til skin is crisp.. about 3-4 minutes. then flip.
Some of the marinade will come off but most will stay. Cook til done, about another 3-4 minutes.  The center will should be just becoming opaque. Make a small cut in the center, pulling open to check. 
Both sides should cook within 7-8 minutes. 
Don't overcook. 
And don't worry about the crust getting dark, it kinda crunches up in part and the flavor is amaze! 

Tuesday, January 15, 2013

Chocolate Syrup homemade


Found this chocolate syrup copycat recipe online after running out of a needed cup for the Ganache cupcakes that I was making.  Googled several and then made a batch, then another and altered and came up with this pretty perfect recipe for chocolate syrup.  

Super easy to make, way less expensive than the one we all grew up with and just as good, if not better!  
Use over ice cream, add to warmed milk for hot cocoa, add to milk for chocolate milk.. and most definitely use in this recipe.  Only the most delicious and dense chocolate cupcake recipe, ever!

Makes a great gift for a hostess.. or in a basket at the holidays, think ice cream sundaes or chocolate martini basket. 

I would highly recommend using the best ingredients you can find.  Organic raw live cocoa powder is readily available and so good for you.  Doesn't mean you can go hog wild with this stuff.. it has sugar in it, it is still a major treat.    But at least when you are going to indulge.. do it well.  Raw live cocoa powder is full of health benefits and antioxidants.. which is just good news.  So enjoy!   


Chocolate Syrup

1 cup water
1/2 cup sugar
2/3 cup unsweetened cocoa powder
1/4 t. sea salt
1 t. vanilla extract

Bring water and sugar to a boil, whisking til sugar is disolved.  
Whisk in cocoa powder and salt.  Boil 1 minute.  
Remove from heat add vanilla.  
Cool completely.  (syrup will thicken a bit when cooled.)

Recipe yields a little over 1.5 cups.


Get a little healthier..  I use coconut sugar, and raw organic live cocoa powder.    Every little bit helps. 

Thursday, April 5, 2012

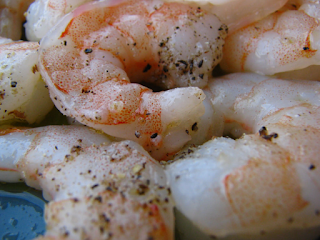
Recipe: Oven Roasted Shrimp & Sauce


This is the best way to cook shrimp.  There I said it.  Once I made them this way, I have never gone back to any other way.  So easy and super yum.  

I usually have frozen shrimp in the freezer.  It makes for a quick, lat minute grab for dinner or impromptu hors d'oeuvres.  There is no long thaw..  In a colander under cold running water, they thaw out in minutes and are ready to use. 

A lot of people think that shrimp is an expensive dinner option.  Well, with my the 2 of us.. it cost approximately $3 at most for more shrimp than we will eat in one dinner and have a few for leftover lunch.  And my 3 year old loves them this way, too.   If we are in the grocery store and I ask her what she wants for dinner.. she will usually say "Shrimp!"

Cooks note: 
When buying...  
(Frozen) I look for large or jumbo uncooked shrimp that are cleaned but still have their shell on. 
("Fresh") or in the fishmonger/grocery case .. just means they have thawed the frozen ones for you.  If you ask, they will tell you it is the same as the ones you buy in the bag frozen.  So, if you don't have time to thaw.. you pay a little more and can buy from the case.    
Cooking shrimp with their shell on, gives them such a better flavor when they cook and is easy to remove when they are done.     


Roasted Shrimp

Place thawed shrimp on a baking sheet covered with foil.  

add...
1-3 T. olive oil
1-2 cloves of chopped garlic
 sprinkle of sea salt
 fresh cracked pepper
rosemary (optional)

Toss together til coated.  Arrange in a single layer.


Preheat oven to 450ยบ    Roast for 2 minutes and give a stir..  and then finish cooking. About 2-3 minutes more at most.  Shrimp will be opaque and not translucent when cooked thru.  DO NOT overcook.  This is where most people, restaurants.. go wrong.  Shrimp dry out and get tough when overcooked.  Watch them, don't depend on a timer or exact minutes suggested.. this is the only way to cook them perfectly.  

Serve warm or cold.. however you prefer.  
For dinner, we usually eat them warm but for a party.. I like to serve them chilled with cocktail sauce.  The flavor is magnificent.. and so much better than bland shrimp cocktail.  And an easy make-ahead item.  Scarlett prefers them with just ketchup.   

Cocktail Sauce

1 cup of organic ketchup (we love Trader Joe's)
juice of 1/2 lemon or whole lime
prepared horseradish (to taste)
dash of Worchestershire sauce
dash of tabasco

Combine together in a bowl.  
easy peasy.  
Serve cold with shrimp or with crab or fish cakes.


Health benefits to shrimp...  

We have learned so much more about shrimp lately.   Shrimp are loaded with Omega-3: omega-6 fats.  Which we have all learned at this point.. are good fats and actually reduce risk of heart disease, diabetes, cardiovascular.. and more, including depression.  

They also are a good source of Selenium.. and selenium found in shrimp is highly absorbed by the human body.  One of the most crucial antioxidants we need for good health.   

And this was a new learning for me... Shrimp also have something called Astaxanthin.  This is something that is valued for being anti-inflammatory and antioxidant properties.  Release of inflammatory messaging molecules is suppressed by Astaxanthin, as is oxidation of fats in immune cells.  Reducing colon cancer, diabetes, tumors.. the list goes on.  

I am not a doctor or researcher.. this is just what I have learned and how we eat.  Definitely shrimp is something we incorporate regularly in our diet.  We all have to figure out what is right for ourselves.  Here is a chart that helps show the nutrients best.   


Sunday, August 22, 2010

Avocado & Balsamic : : Favorite things

This is how I know my 2 year old is mine genetically. I mean beside the fact of 10 hours of labor I endured which I remember all too well.  This is one of those things that seem to have been carried down.  She loves balsamic vinegar.  I have never seen a young child like vinegar.  And the combination of it with an avocado is one of her favorite things.  


1st time I had this, I died and went to heaven.  The juxtaposition of the creamy avocado and the syrupy tangy balsamic vinegar.. is just that to me. Heaven.  

Now you can fuss here and add a sprinkle of chopped red onion, tomato or whatever else you want.. and sometimes I do.  But more than not, this is it. Simplicity at it's best.  Fresh ingredients, good quality ingredients.  

So, here's what you do.. 
Cut avocado in half, removing pit. 
Pour good Balsamic vinegar into the vacant hole creating a dark little pool. 
Using a spoon.. scoop and eat.  
Delicious. 
Easy peasy!! 

and I must add.. I have impressed more people serving this at a dinner party.  Even though it's simple, it's one of the combinations that sky-rocket into amazing. Hope you try it.